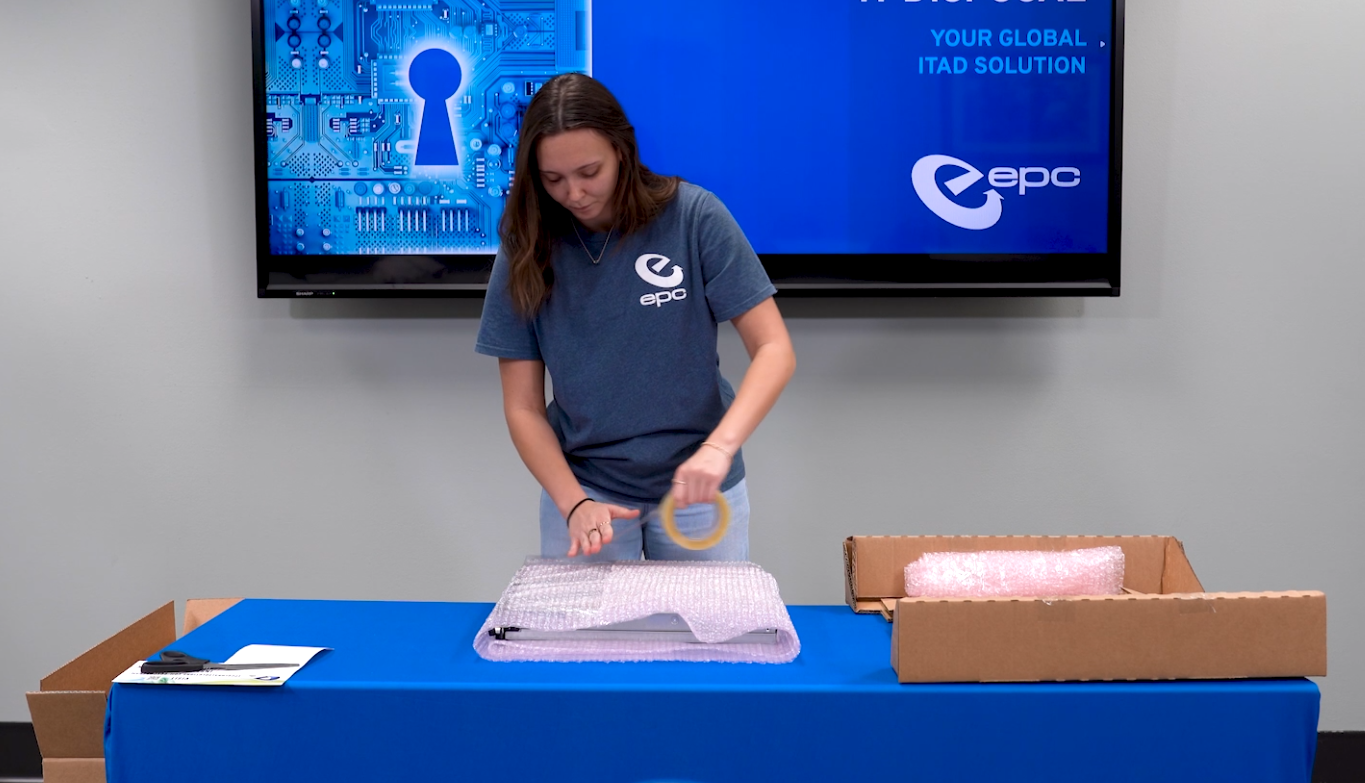
Wrap tape fully around the bubble wrap and server on both ends, securing the bubble wrap around the server.
Wrap & Pack Guide
Servers
Follow our packing guide below to ensure your server makes it to our facilities safely
Step 1
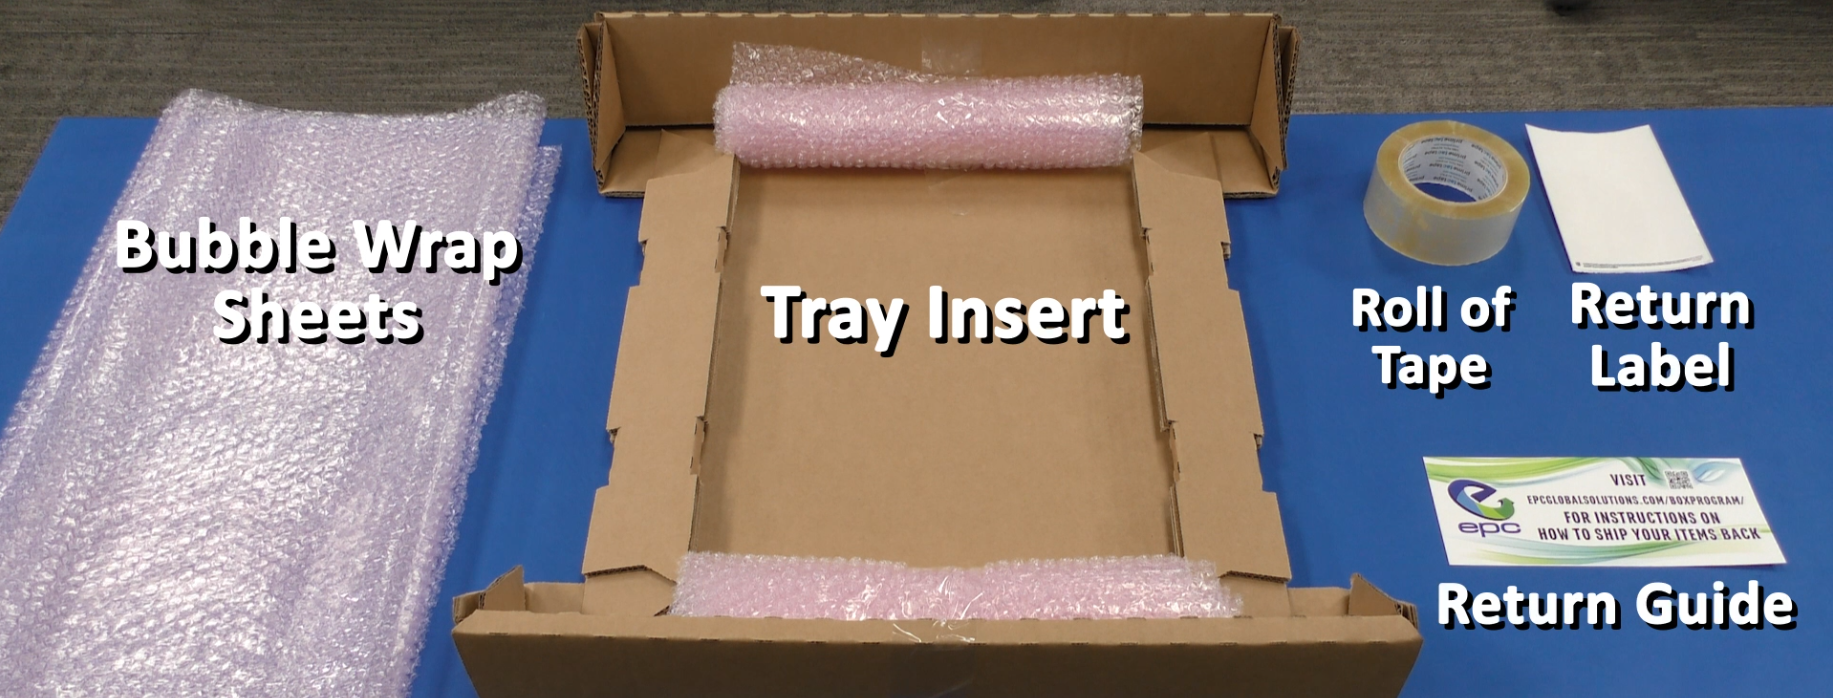
Your box should include a tray insert, roll of tape, sheets of bubble wrap, printed return guide and a return shipping label.
Step 2
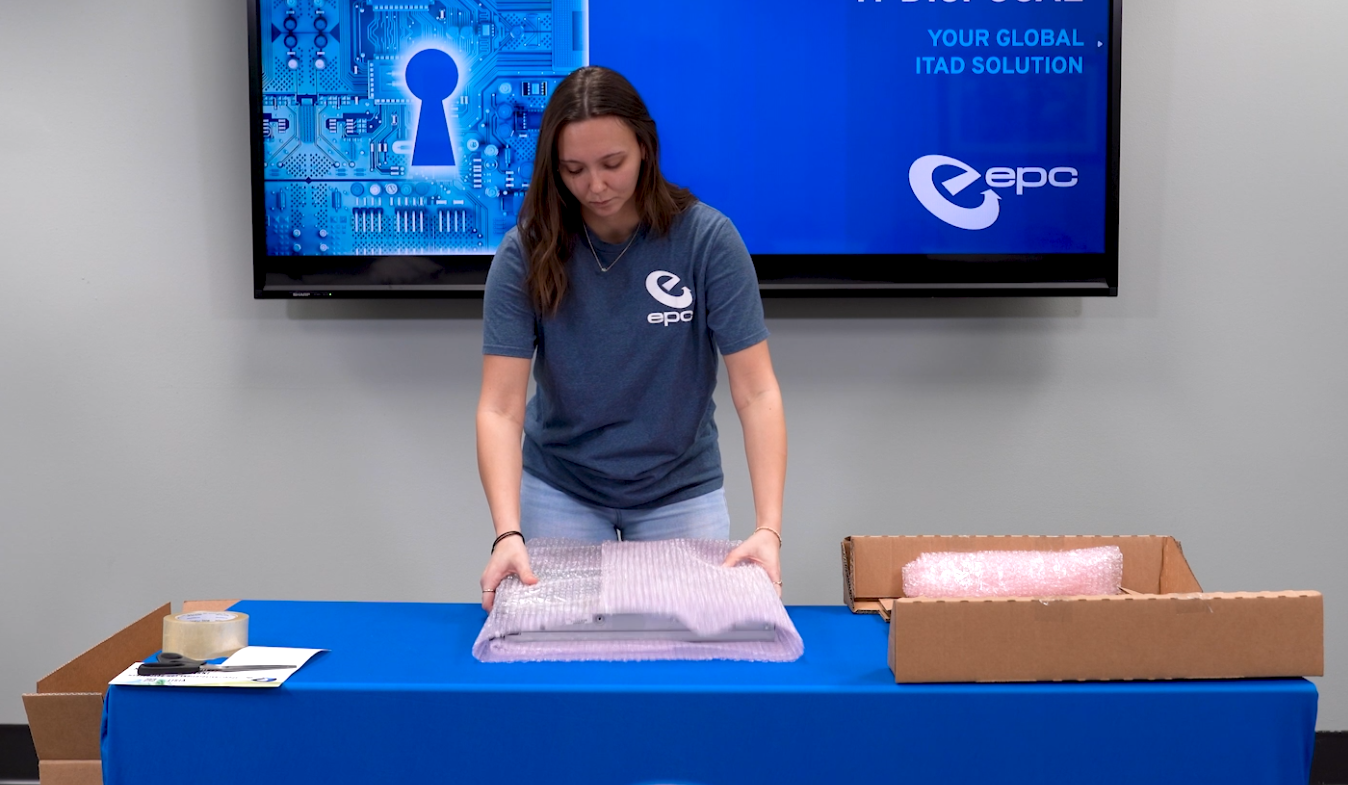
Wrap the sheet of bubble wrap around the server.
Step 3
Step 4
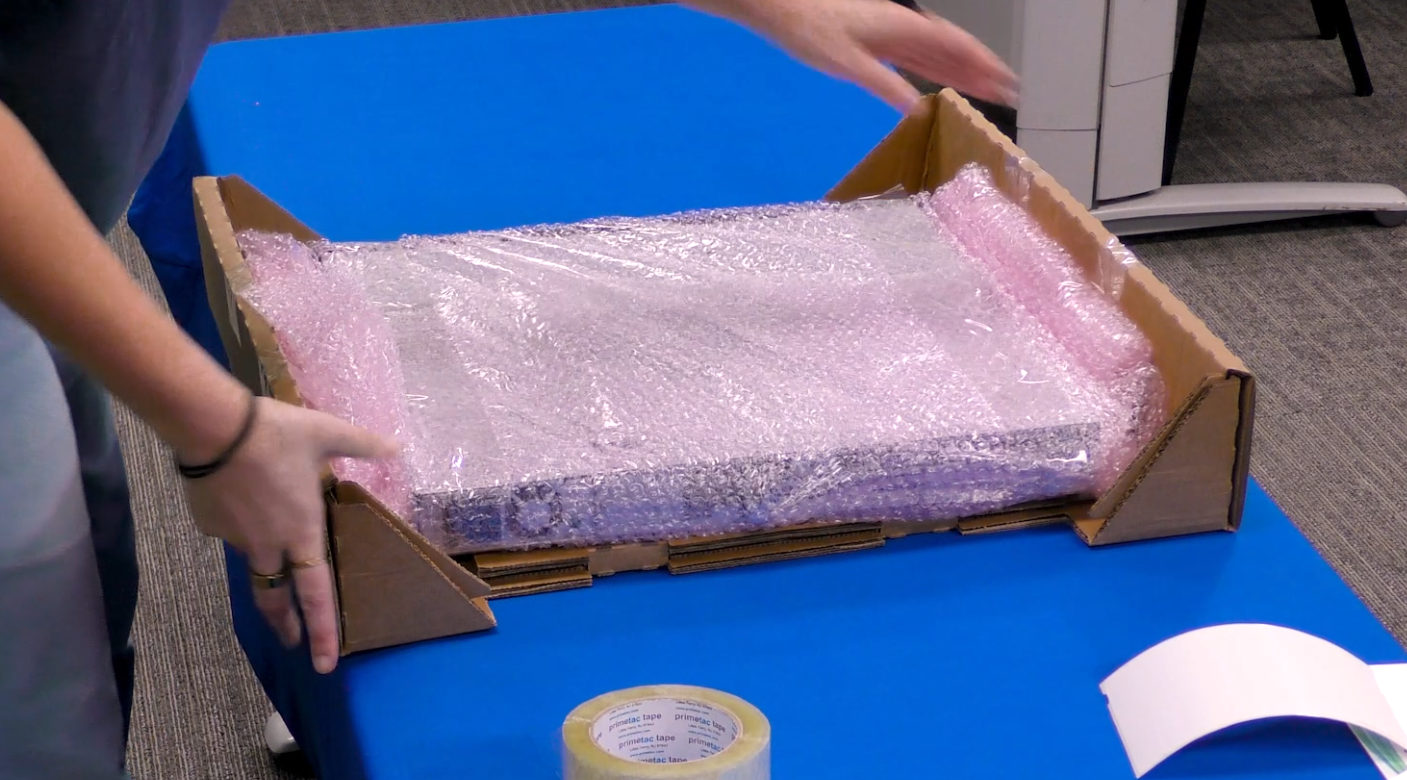
Place the wrapped server into the tray insert securely between the two rolls of bubble wrap attached to the tray insert.
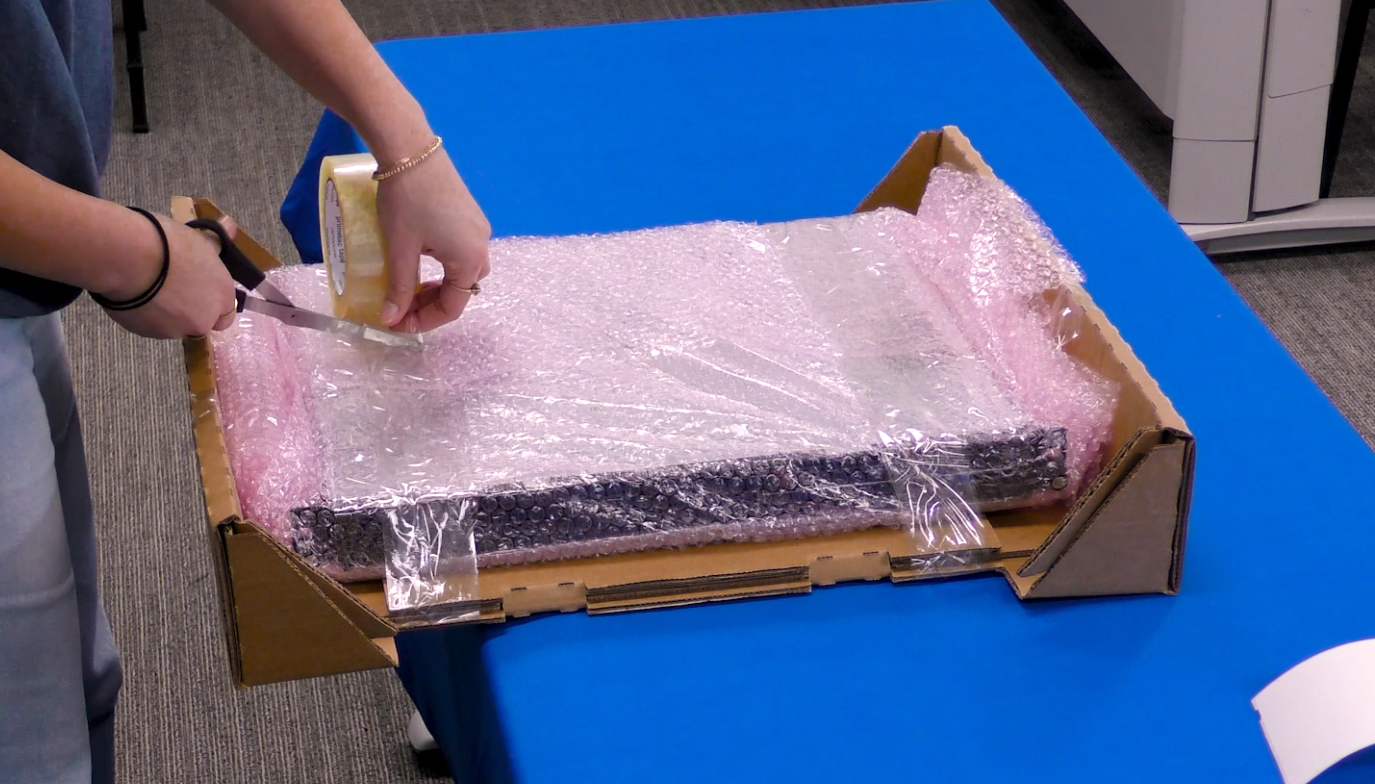
Step 5
Wrap tape around the tray insert and server three times on both ends, ensuring the server is secure and won’t shift.
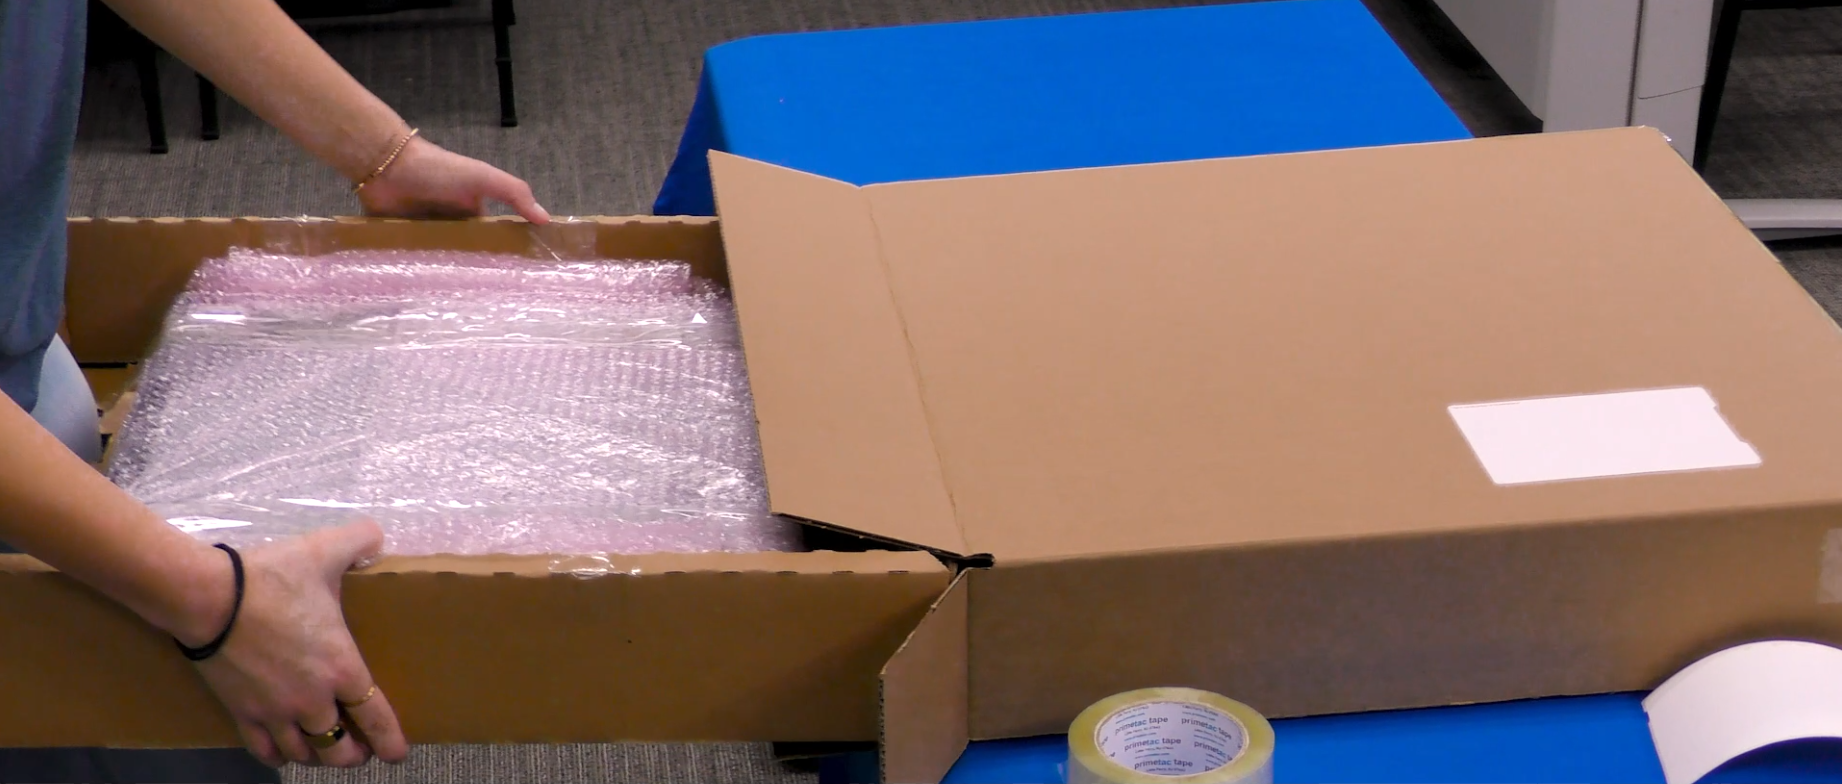
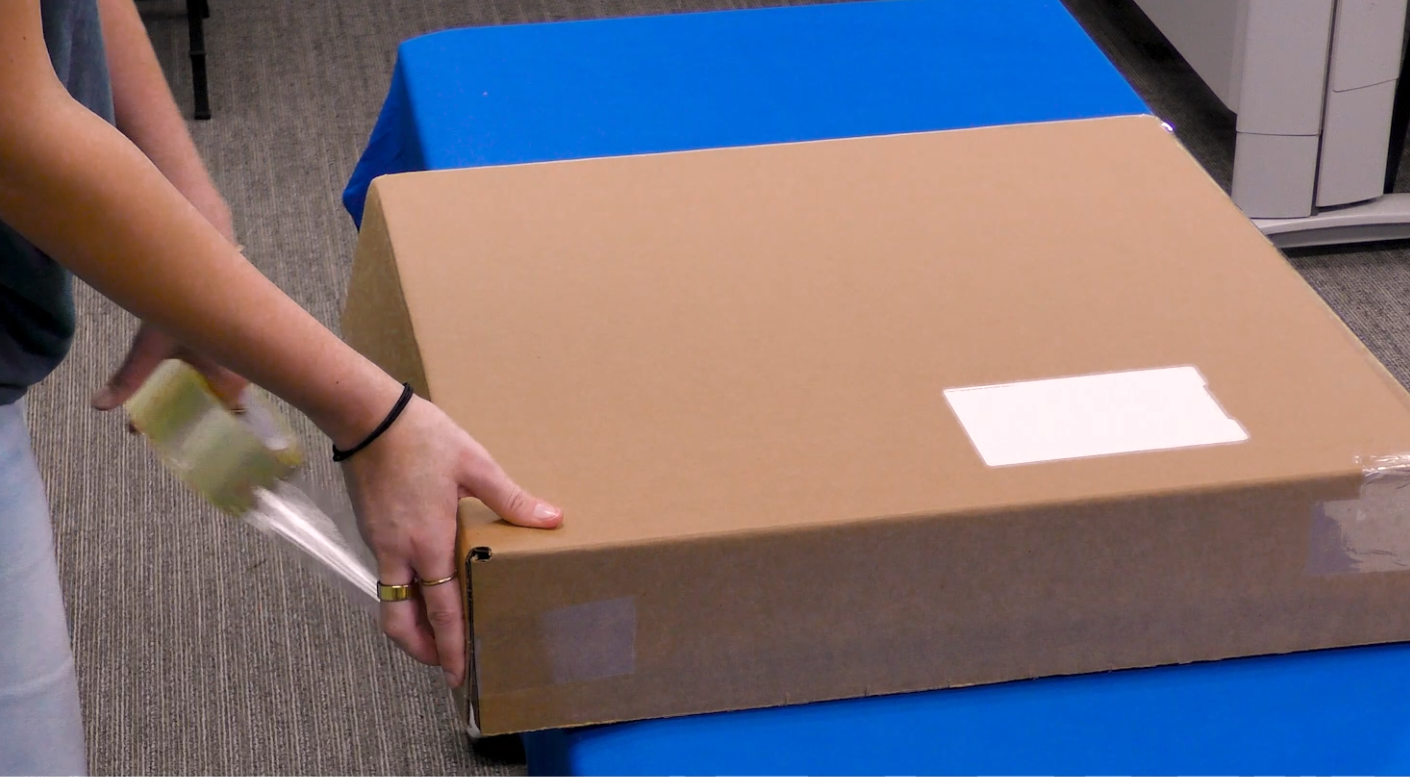
Step 6
Insert the tray with the secured server into the box horizontally and tape it shut.
Step 7
Once the box is secure, take the provided return shipping label and place it over the existing shipping label on the box. It is important that no part of the previous shipping label is visible.
Your box is ready to be shipped! Use the return options on the sheet included in your package to either schedule a pick-up or find a drop-off location.